

评测
REVIEWS
作者: Simon Schirru 日期: 2024-04-02 10:59:00
In this article you will find some information already contained in the SPL MixDream XP Mk2 manual as well as some additional clarifications on its features. You'll also find some tips on how to physically connect your equipment and set up your DAW to start using this fantastic summing mixer right away. If you are not familiar with analog summing mixer and the hybrid working environment, I strongly recommend you read this other article first (link to other article)
Brief overview of the SPL MixDream XP Mk2
The recently released MixDream XP Mk2 by Germany based company SPL, is a class A technology summing mixer with 16 inputs to 2 outputs. Of great construction quality, it offers excellent performance and high sound fidelity. It is based on the first generation of MixDream XP, in addition to a new design, it offers some new and some improved features. It can be used as a standalone summing mixer or in conjunction with other summing mixers like the MixDream 2384, or other MixDream XP connected in parallel, or any other summing mixer in the market.
This is the MixDream front panel

and the back panel

from now on we will refer to the MixDream XP Mk2 simply as MixDream, also taking into consideration that the operation of all SPL summing mixer works in a similar way.
INPUTS
The MixDream has 16 main inputs that use two DB25 type connectors, the inputs are wired inside the summing mixer has eight stereo pairs Left/Right, from 1/2 to 15/16.

Stereo to Mono Buttons
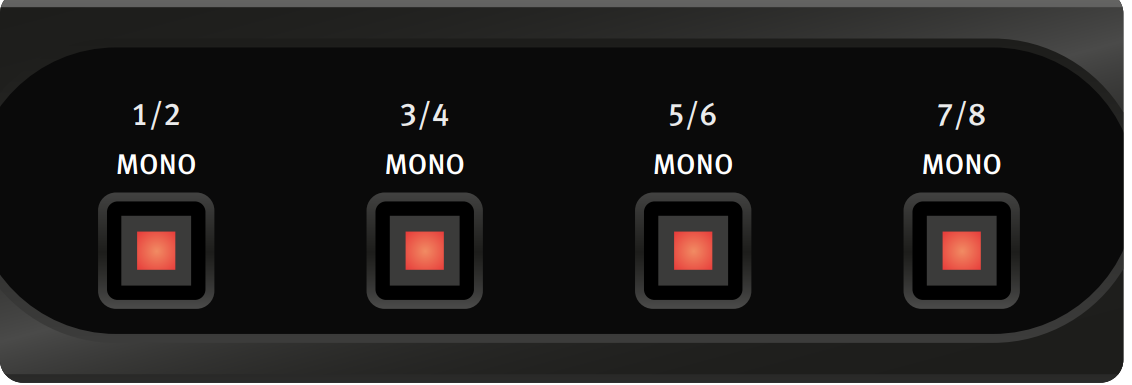
The stereo pairs are all panned hard left and hard right in the stereo field, in order to reproduce a mono signal panned at the center of the stereo field using the default configuration two inputs instead of just one are needed, resulting on occupying one input that cannot be used for other purposes. Fortunately the first four stereo pairs on the MixDream (from 1/2 to 7/8), can all be independently switched to mono using a button on the front panel also labeled Mono. In short, while dealing with mono signal such as vocal, kick drums, snare, bass or any other track you want to put at the center of the stereo field, you can easily switch the mono button of a pair and converting the correspondent stereo pair in two mono signals. A LED inside the button turn red when the mono feature is active.
-18 dB buttons
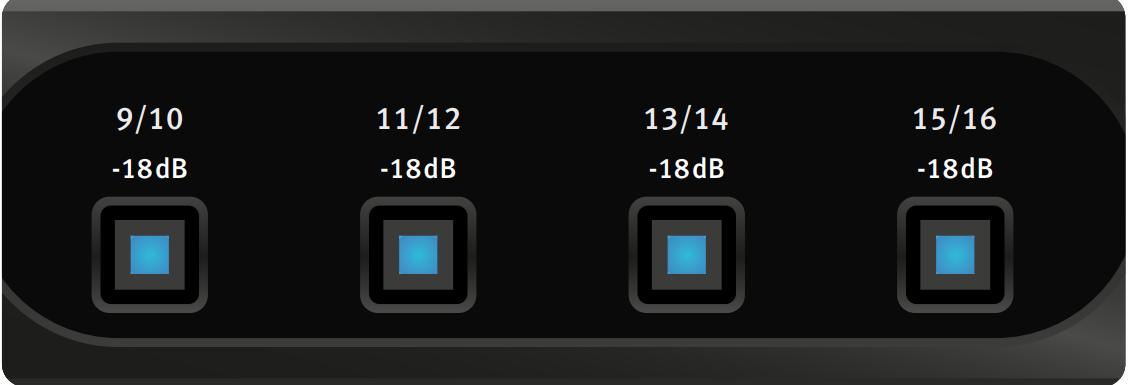
An interesting feature, and also an improvements over the first MixDream XP buttons. You can activate -18dB attenuation independently on each of the four stereo pairs from 9/10 to 15/16. When the signals output from the DAC are converted at a low level, they inevitably lose quality due to the lower resolution at which they are converted. To preserve details, the signal can be converted to a higher level and only then attenuated in the summing mixer to bring it to the optimal level without losing resolution. This procedure can work amazingly on signals that are typically summed to low levels. Time-related modulation effects (such as reverb or delay) get huge improvements in quality and detail when summed together using the -18dB function. A blue LED inside the button will indicate that the -18 dB function is active.
Expansion Input
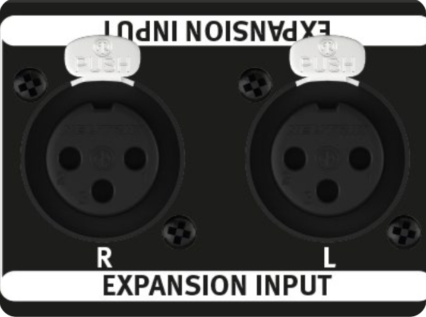
A input stereo pair on the back panel can allow you to connect an extra summing mixer to extend the sum to a greater number of channels. The summing mixer can be a second MixDream, as well as any other brand of summing mixer.
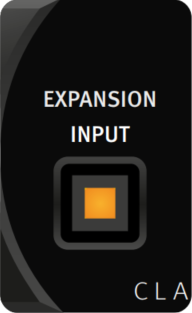
Another way to use the Expansion Input is to connect it to another output stereo pair from your I/O device, to be summed together with the rest of the main 16 inputs. Doing so, It will allow MixDream to sum together up to nine stereo pair (18 line inputs) instead of 8 stereo pair (16 line inputs). This extra stereo pair will not have the mono option, neither the -18 dB function available. A switch on the front panel with a yellow LED will allow to activate the extra input.
OUTPUTS
Main Output
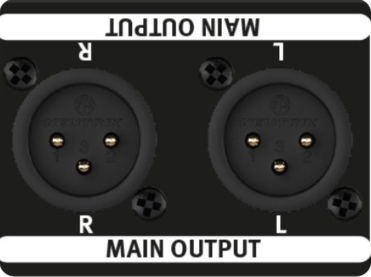
The sum of all inputs in the MixDream will be available via the XLR connectors Main Output. Those balanced output can be connected directly to your converters and printed in your DAW as a stereo audio track.
Monitor Output
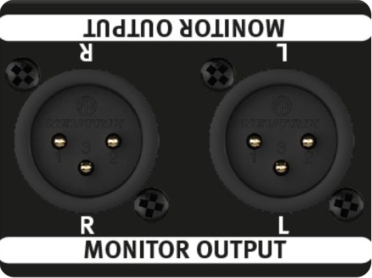
The Monitor Output pair is connected in parallel with the Main Output, can be connected to your monitor control unit or directly to your speakers via balanced XLR connectors.
It's worth noting a warning written in the manual: Since main and monitor outputs are connected together in parallel, using an unbalanced cable for one of the pairs will also unbalance the other output.
Variable Output Adjustment Knob
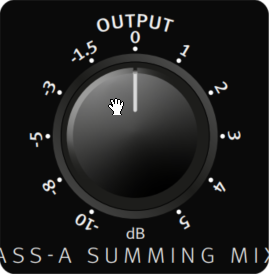
On the front panel a large knob will allow to adjust the signal level of both the main and monitor output, with a range from -10dB to +5dB. Since the summing mixer is an analog device, the input signal can be pushed quite hard compared to the signal processed via digital summing in a DAW. However, you need to adjust the signal when it gets too hot (or not hot enough), controlling the output helps you reach the optimal level before conversion.
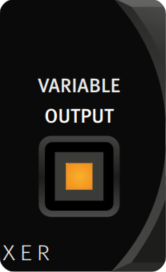
You can activate the Variable Output via a switch (yellow LED) located on the front panel. This button works as a bypass, which is useful for comparing the signal with and without level adjustment. Although the adjustment does not allow a huge difference in the level (-10 dB max), it is always better to pay attention to sudden signal changes especially when working at high volume, both using speakers and headphones.
HOW TO CONNECT MixDream XP Mk2
The diagram below shows an easy way to connect the MixDream. It might be necessary to make changes to adapt it to your personal needs and if different or additional devices are connected. This simple setup lets you get started right away and experience firsthand the differences that come with adding a summing mixer to your setup.
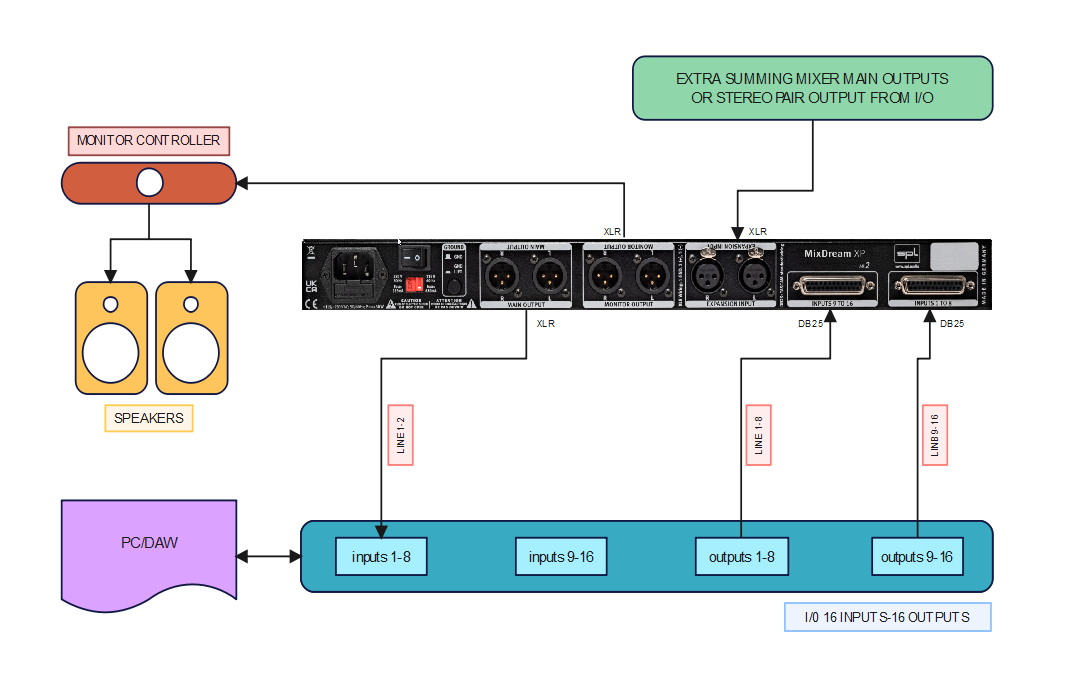
Converters (in blue)
The main I/O converter in the example has sixteen outputs. These number of outputs is ideal to use the MixDream at full capacity, but not every mix or master will required using all 16 inputs in the summing mixer. However, it is better not to set a summing mixer to always work with few inputs (such as 4 or 6), this will drastically reduce the advantages offered by the analog summing itself. The basic principle to follow will be: the more tracks you add, the more the result will be influenced by the summing mixer itself
Monitor Controller (in red)
To allow adequate control of listening level and routing options, a monitor controller is highly recommended. SPL itself offers to the market several monitor controller models with different features and price ranges. If your monitor controller has more than one input you can use different listening sources. This will allow you to make comparisons and make more informed processing decisions.
Expand MixDream Inputs (in green)
As mentioned above, it is possible to connect a second MixDream, or any other summing mixer of any other brand, to the main MixDream. Make sure that both summing mixers are summing different tracks and connect only the outputs of the second summing mixer to the main MixDream's expansion input. Another alternative is to connect a pair of stereo outputs from another converter to the expansion inputs.
Add extra analog device
Using this setup will allow you to easily add extra analog equipment. Since using a summing mixer requires an additional conversion stage, an efficient method to avoid additional conversion is to add additional signal processor between the summing mixer and the I/O converter.
There are two placements where this can be done easily:
1) Between your I/O outputs and the MixDream inputs. Useful for mono tracks such as snare, kick, bass, vocals, all often processed using compressors and/or equalizer. Also good for stereo pair, more often summed as a bus of some kind, for example as a drums bus. Of course It is possible to add any external processor to any stereo track, where typically the use of a dual processor is required, allowing the left and right signal of a stereo pair to be processed with the same device. This method will allow you to process your tracks and also directly listen to the result via the MixDream monitor output.
2) Between your I/O inputs and the main output of the MixDream. This method will allow analog processing of the mix or master bus, typically using devices such as bus compressors, limiters and equalizers. This method unfortunately might need some extra routing in order to listen the result of the processing. In fact, the MixDream monitor output only allows you to listen to the result of the sum and not the processing that took place after on the main output. A simple solution is to not listen using the MixDream's monitor output, but listen via an additional output of your converter, monitoring the input on the print track in the DAW (an example will be shown in the next section of this article).
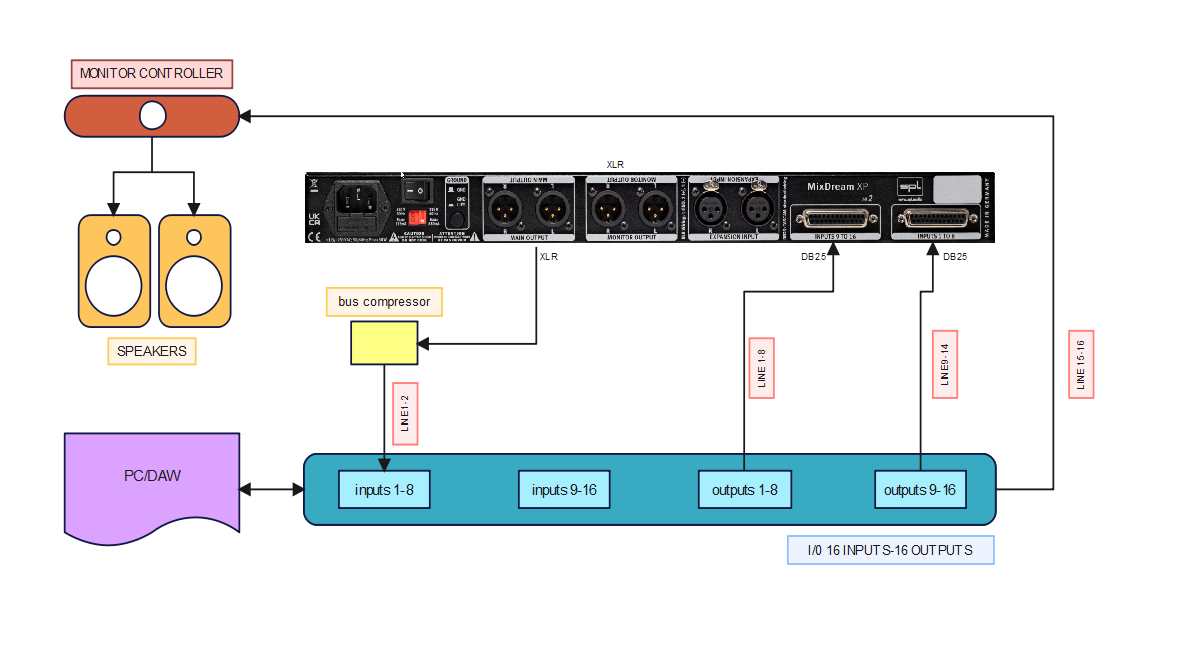
In this simplified diagram we are using the I/O output 15-16 connected to the monitor controller, so that we can listen to the result of our sum together with the process taking place in the mixing bus (bus compressor in this specific example), from the same output we can listen to our mix after printing it. Of course, if your monitor controller has more than one pair of inputs you can use multiple listening sources at the same time. it will be easy to perform, for example, a simple comparison between the analogue and digital sum of the same tracks.
Anyone who owns additional analog equipment or needs to occasionally rearrange their workflow should consider adding a Patch-Bay to their personal setup. A patch-bay, thanks to a simple rearrangement of some patch cables on the front panel, will allow highly customizable routing and maximum flexibility in connecting your devices.
SOME IDEAS AND TIPS TO SET A DAW WITH THE MIXDREAM
The following part of the article shows some general ideas on how set your DAW. You can use any DAW to get the same or similar results, as they all work more or less similarly. Keep in mind that how you set up your DAW depends on your workflow and the external devices you use. Use this section of the article as a starting point to understand the basics and then make your own changes to suit your needs.
Basic organization of a template in a DAW
An effective way to organize the tracks to be summed is to divide them into subgroups. In your template you can have as many subgroups as you need. Working on a subgroup associated with an instrument allows you to make global choices without the risk of ruining the internal balance of the tracks that compose it, as in the case of the drums bus where all the drum tracks work together as a single instrument. A subgroup can also contain several instruments, this will reduce the amount of tracks you have to manage late in the mix. Grouping different tracks that work together organically is a good choice, for example in the case of vocals and backing vocals, or songs with different parts of guitar.
The subgroups, in addition to being divided by type of instrument, can also be divided according to their function in song. This is an example:
Rhythmic Section: Bass and Drums
Guitars: electric and acoustic guitars, both rhythmic and lead
Keyboards: all keyboard, piano, Rhodes and similar instruments
Ambiance: All effect as delay and reverb
IIt's really up to you how you organize the session, all of these choices should suit your mixing style. Using an adder mixer will immediately present you with a choice of where you want to use it in your workflow. We can see two basic methods for working with the summing mixer in the following diagrams:
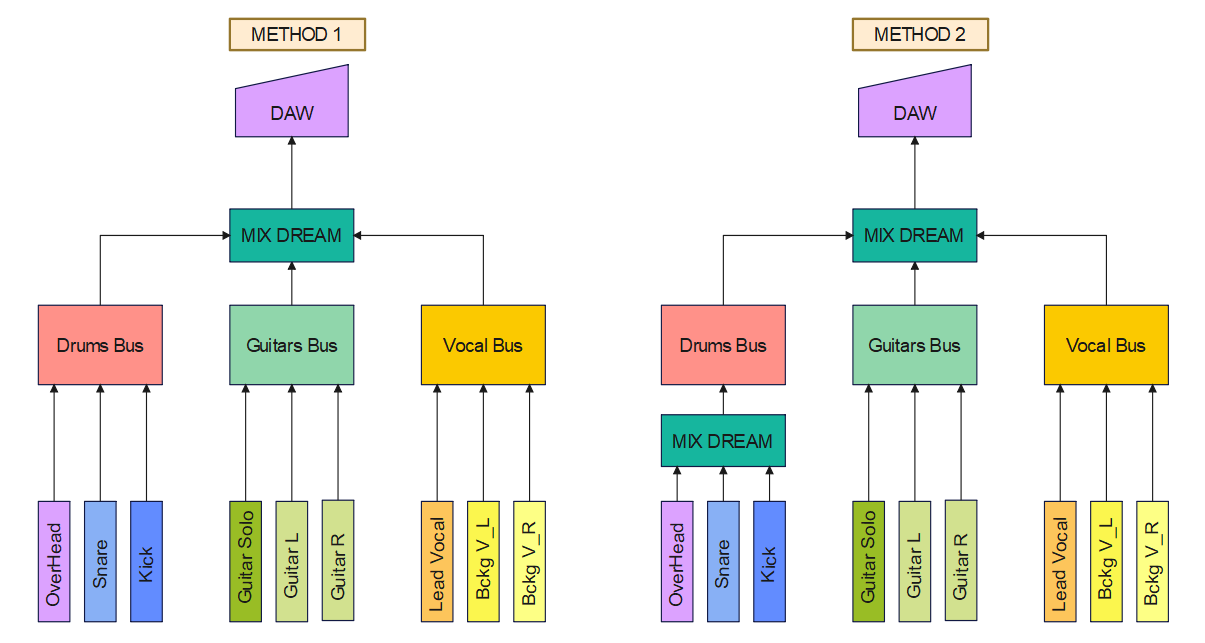
Method 1
This method is pretty simple, all your tracks in the mix are initially organized into subgroups in the DAW. In this example, the subgroup divided by instrument type takes the name of the bus it uses:
Drums Bus : all drums track
Guitar Bus : solo guitar, rhythm guitar
Vocal Bus : Lead vocal and any additional vocal or background vocal
Once divided and organized into subgroups, all subgroups are summed together using the MixDream. It is worth noting that this method will only require one additional A/D and D/A conversion stage. The summing mixer works when summing subgroups, but the subgroups themselves are actually summed digitally in your DAW. This method is quite efficient and simple, especially when you often need to make changes on individual tracks. You only have to print the sum once when the mix is finished, making this method relatively quick.
Method 2
The second method is to use MixDream to first sum tracks into subgroups, then sum the subgroups together. In the previews example only the drum tracks are summed using MixDream. This method has advantages and disadvantages.
Advantages:
- all the analog characteristics deriving from the summing mixer will be accentuated due to the different summing stages necessary to create the subgroups
Disadvantages:
- you need to print the subgroup, Printing will no longer allow you to edit individual tracks, but only adjust the analog sum of your tracks. The alternative is to reprint the sum again after each change.
- an extra stage of conversion A/D and D/A for each subgroup more then the Method 1
- take more time, printing and eventually recall your setting to make adjustment later
Method 2 appears to be more problematic, however it may be worth using when it can help achieve a certain desired sound result. it is certainly a method more suitable for professionals who know exactly what sound they are looking for and can face a certain number of challenging choices with peace of mind. Some of these disadvantages can be greatly reduced if you have a second summing mixer or when working with a small number of tracks.
Having both a flexible setup and a flexible workflow will allows you to use these methods only when necessary on a case-by-case basis.
Small example in Pro Tools
I want to share two screenshot of a small mixing session with Pro Tools to show you a couple of details related to Method 1 discussed above.
Few things are worth to notice:
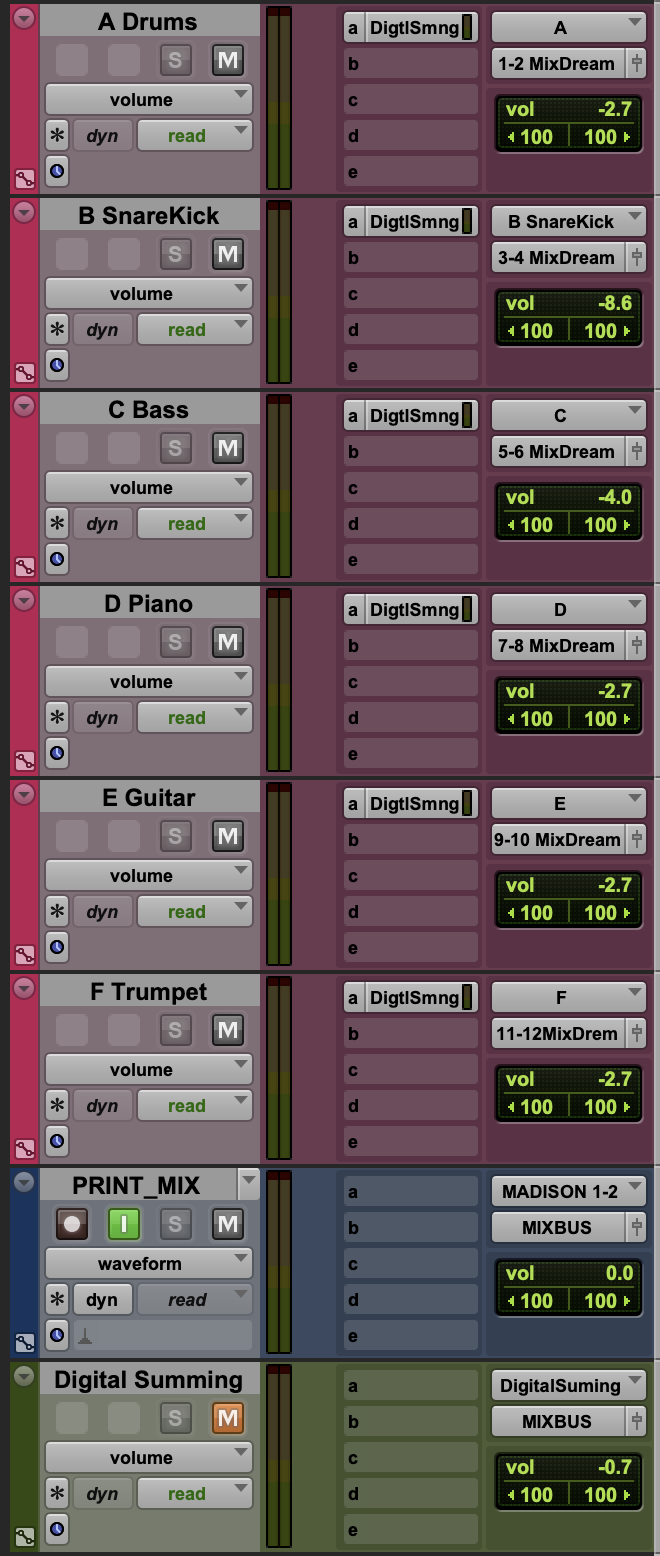
- in pink, from A to F, all the subgroup divided by instruments.
- Note that A Drums and B SnareKick groups are both drums-related groups. Snare and kick drums are present in both groups. On the B SnareKick I use the mono switch on the MixDream. Having double those instruments works especially well with snare and kick driven music. Balancing the drums this way may require more careful tuning of your balance as the two groups work independently, but I like it better than having the bass and snare completely separated into two groups. A simpler method is to use just one stereo group for the entire drum set.
- C Bass is a stereo group, despite bass is recorded in mono, soon or later it will be sum in a stereo final mix, then I decide to use a stereo group right away. Here again the Mixdream has the mono switch active. As the signal in the group is split and then summed again in the DAW there may be an audible difference compered to directly use a mono group to send to the MixDream (you still need the mono switch). I recommend you try both ways, in my case there wasn't a big substantial difference.
- The audio track called PRINT_MIX is the output of the analog sum of the MixDream. In order to listen how your summing mixer is processing your track, the Input Monitor button (I) needs to be active.
- To print the sum while playing back your tracks, the Recording button in your DAW needs to be activate.
- In this session I created an auxiliary bus track called Digital Summing. Each audio track uses a send, also called Digital Summing, to sum digitally all my track in this auxiliary bus. The purpose of this auxiliary track is to compare and listen in this mix how digital and analog summing where behaving differently. Remember while doing so to listen only one of the two sum at the time, while listen the MixDream via the PRINT_MIX track keep the digital summing track in Mute (M) and vice-versa.
- If you want to use one or more bus dedicated to effect (as reverb or delay) remember to use one of the stereo pair in the MixDream from 9/10 to 15/16 and active the -18dB switch.
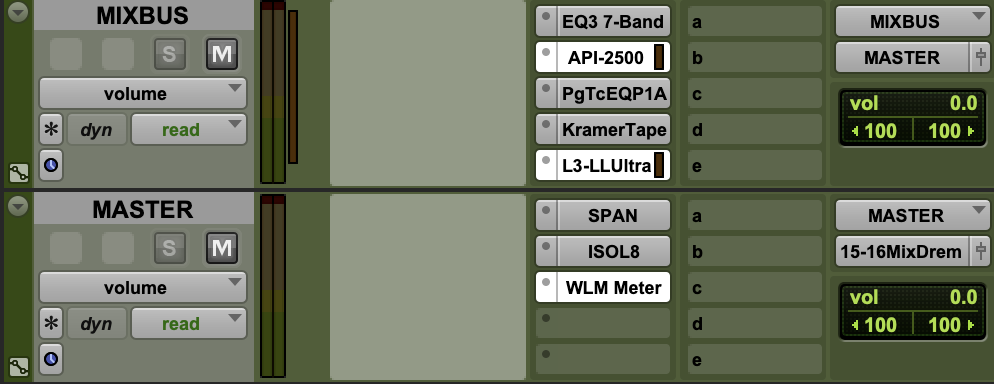
- After the sum (digital or analog) the tracks get send to a MIXBUS. In this auxiliary track some pre-mastering processing is active, this allow to listen the mix closer to a finished product. This MIXBUS is then sent to a MASTER auxiliary track where some monitoring plugins are loaded
- The MASTER track output is sent to a stereo pair in the I/O, this is because after printing and processing the sum from the MixDream using pre-mastering plugins, you need to dedicate a different output from the I/O to the monitor controller, you cannot longer use MixDream Monitor Output.
Final words
Working with any analog summing mixer and getting used to a new workflow can be frustrating at first. However MixDream XP Mk2 stead out for his simplistic and straight forward features and his affordable price. I hope this article has helped you understand, use, and set up this fantastic analog summing mixer.
作者:HIFICLUBE,中音翻译 日期: 2026-01-21 02:57:00
HIFICLUBE,中音翻译 2026-01-21 02:57:00
作者:Audio & Cinema em Casa,中音翻译 日期: 2026-01-14 02:45:00
Audio & Cinema em Casa,中音翻译 2026-01-14 02:45:00
作者:hifi-turkiye,中音翻译 日期: 2025-12-16 03:45:00
hifi-turkiye,中音翻译 2025-12-16 03:45:00
作者:HiFi Test,中音翻译 日期: 2025-12-04 02:24:00
HiFi Test,中音翻译 2025-12-04 02:24:00
作者:Proaudio tech,中音翻译 日期: 2025-12-02 10:14:00
Proaudio tech,中音翻译 2025-12-02 10:14:00
作者:lite-Magazin,中音翻译 日期: 2025-11-06 02:25:00
lite-Magazin,中音翻译 2025-11-06 02:25:00